
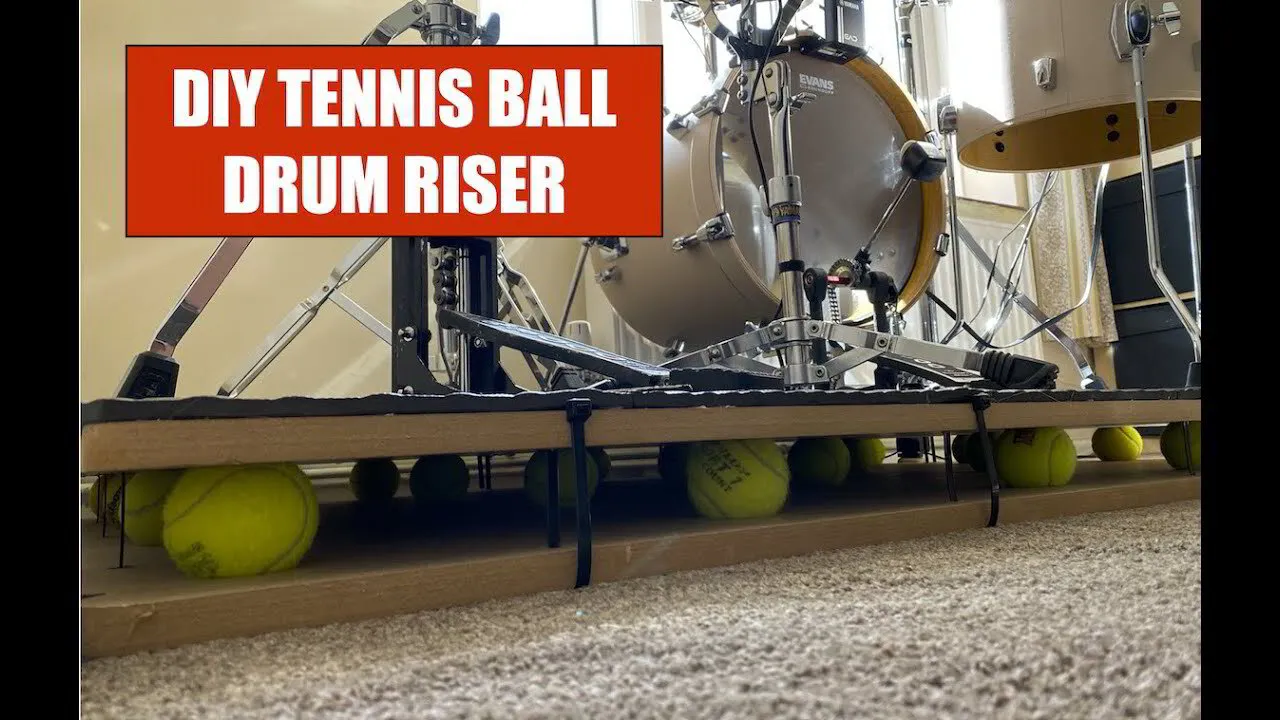
"Enjoy uninterrupted drumming sessions with a tennis ball drum riser. Despite being significantly quieter than acoustic drum sets, electronic drum kits still produce noise through drum stick strikes, cymbal pad hits, kick pedal presses, and bass pad beats. These sounds and vibrations can travel through the frame of your drum kit and cause annoyance to those nearby. To prevent this, a tennis ball drum riser provides a simple and affordable solution. By absorbing the vibrations, it stops them from spreading to the floor and disrupting others. Build your own tennis ball drum riser today and take the first step towards a more peaceful drumming experience."
Building a tennis ball drum riser for soundproofing electronic drums is a creative and cost-effective solution that can help reduce the amount of noise your drum kit generates. This type of drum riser involves using tennis balls as sound absorbers, which can provide excellent results and a unique look. Here is an in-depth guide on how to build a tennis ball drum riser for soundproofing electronic drums:
Materials:
2 or 3 MDF or particleboard (for the base of the riser)
Tennis balls
Hot glue gun
Measuring tape
Saw or jigsaw
Screws
Drill
Screwdriver or power drill
Optional: sandpaper, paint or finish
1. Cut MDF Sheets to Size
Based on the size of your electronic drum set, cut three MDF sheets to the desired size. A standard size of 1200mm x 2400mm should suffice for most setups. Ensure that all three sheets are of equal size.
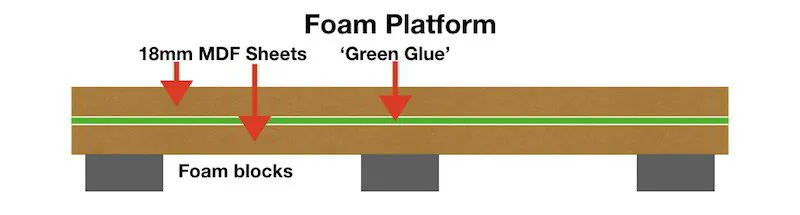
2. Glue Two Sheets Together
To increase the mass of the structure and enhance its soundproofing capabilities, glue two of the MDF sheets together using green glue, a sound-dampening compound. You can choose to use only one sheet on top if you prefer to save costs.
3. Drill Holes for Tennis Balls
Use a 32mm drill bit to make 30 evenly spaced holes in the third MDF sheet. You can drill more holes under the area where you will be sitting for additional support.
4. Drill Tie Holes
Drill small holes (suitable for screws) around the perimeter of the riser, about 1 inch from the edge and every 6 inches apart. These holes should go through all three MDF sheets for secure cable tie placement. To ensure proper alignment, drill through all three sheets at once.
5. Glue Tennis Balls in Place
Spread green glue around the rim of each hole and insert a tennis ball. The ball should fit snugly in the hole.
6. Place Doubled MDF Sheet
Before laying the doubled MDF sheet on top, cover each tennis ball with green glue. As the sheet will be heavy, enlist the help of a friend to lower it onto the tennis balls, making sure it is aligned properly.
7. Secure with Cable Ties
Thread cable ties through the tie holes and tighten without compressing the tennis balls.
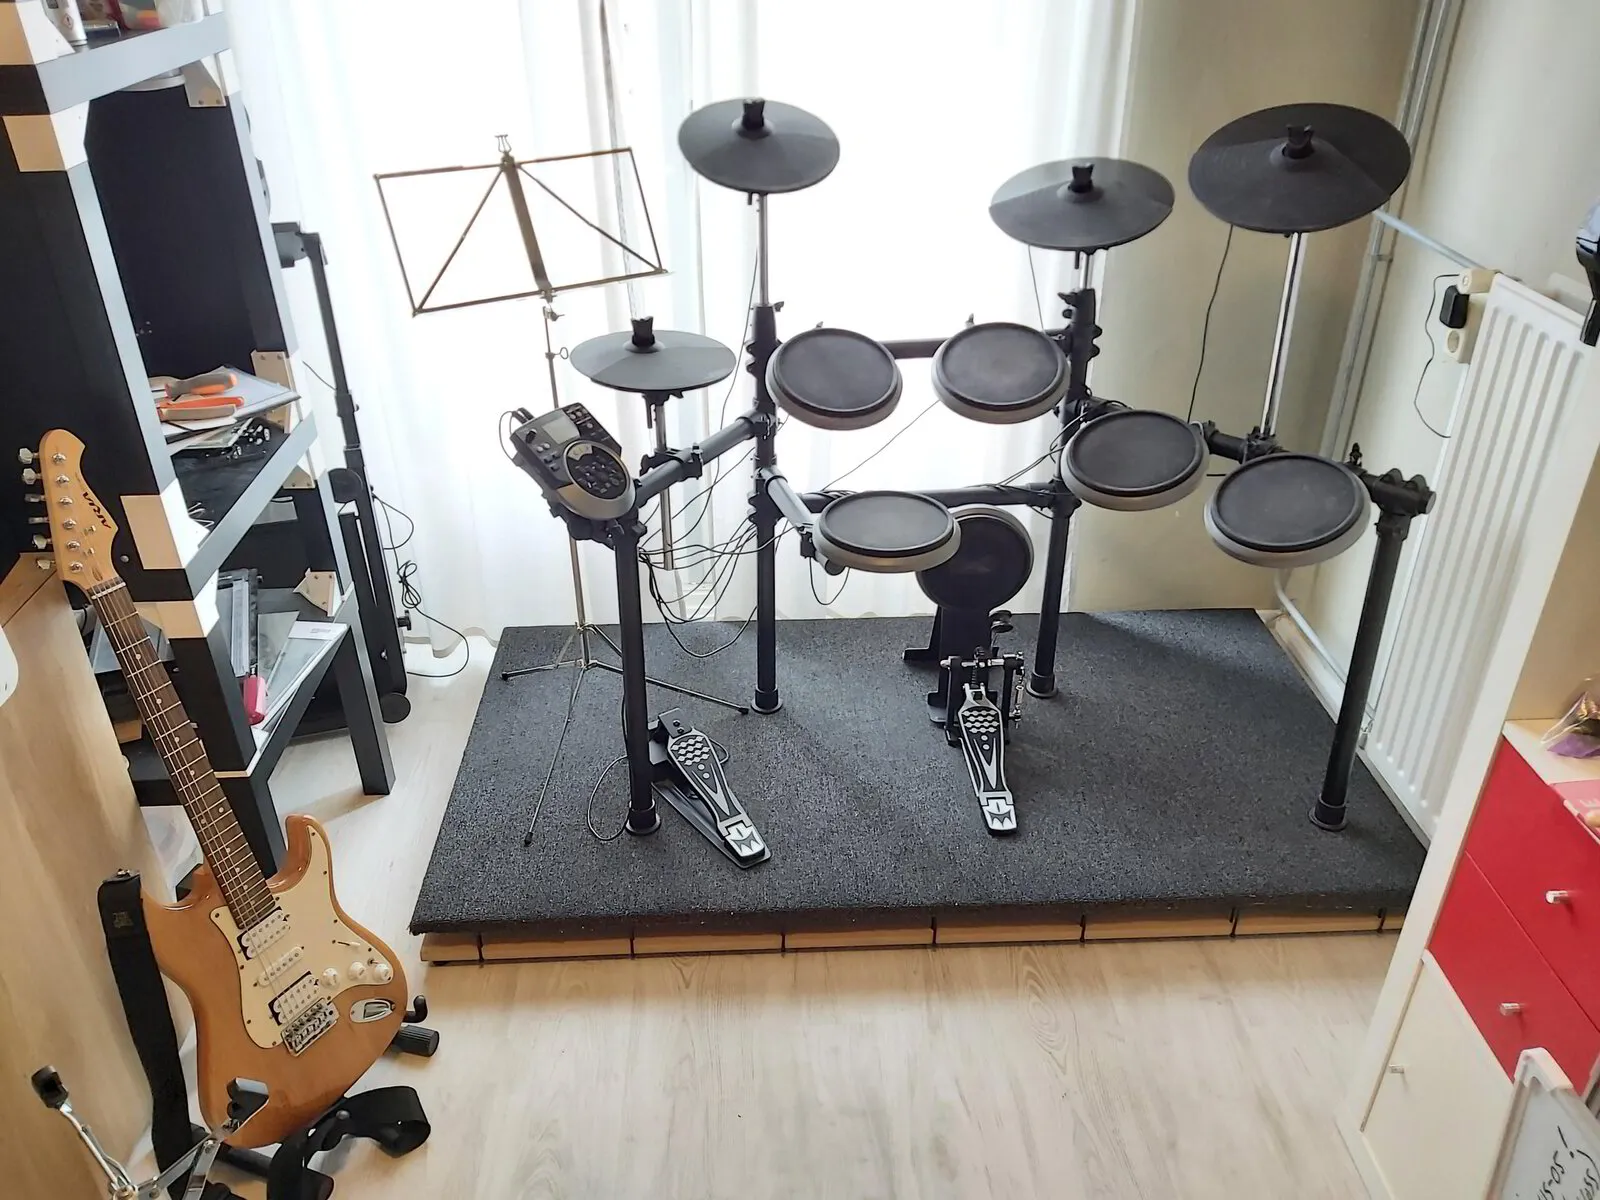
8. Place a Rug on Top
To improve the appearance and enhance the soundproofing, place a thick soundproof rug on top of the tennis ball riser.
With these steps, you can build a unique and effective tennis ball drum riser for your electronic drum kit that will improve the sound and playing comfort. Remember to take your time, follow the instructions carefully, and use the right tools and materials for best results. Good luck!
Another option is to use specially dense foam strips as a platform for your studio. These foam strips offer superior sound isolation compared to tennis balls and won't rock when subjected to weight or movement. Although they are likely to may cost more, they are well worth it for the effective results
An alternative method that has become more affordable recently is to use Sorbothane hemispheres. These hemispheres, made of a synthetic material known for its excellent vibration-absorbing properties, can be found at a reasonable price on eBay. By placing them at the bottom of the legs of your electronic drum rack, you won't need a platform. However, it's important to make sure you know the weight of your kit to choose the right hemispheres, as Sorbothane only works effectively when it's within a specific weight range.

Instead of using platforms, you can utilize Sorbothane hemispheres to absorb vibrations. These hemispheres can be found on eBay at an affordable price and they are one of the best vibration absorbers available. You will need to know the weight of your equipment in order to select the most suitable hemispheres. Simply place the hemispheres at the bottom of your electronic drum rack legs and you won't need a platform.
For other equipment like stools, pedals, and hi-hats, you can cut circles from MDF and place them on the hemispheres. You'll have to calculate the weight of the stool, MDF, and yourself to determine the best hemispheres to use. This same method can be applied to the hi-hat stand and bass drum pad. Commercially available pedal platforms are based on this concept, but this method is much more cost-effective.
Not that Handy on the Tools?
All cool - I got you covered. If your looking for someone with building experience and the right tools for the job, look no further. I can build your Tennis Ball Drum Riser for you and deliver and install it too. All I need is the dimensions of your drum-kit and I can build you a neat looking and effective Tennis Ball Drum Riser.
I have built two soundproofed studios, acoustic treatments and my own drum-risers over the years. I am currently extending the LRRecords Studio and building the Control Room, so I am in 'building mode'. I have worked in the building & construction industry throughout most of my working life as a 'day job'before going full-time in the studio. My grandfather was a Master Builder and Building Inspector for his career - it's in my blood....
Contact Us for a quote on building a Tennis Ball Drum Riser or for any studio building and/or acoustic treatment projects.
Keen for more great content like this to help with your drumming journey? I provide tips, tricks, advice, opportunities, entertainment, downloads, sheet music and musical application for drummers to learn, be inspired and get motivated to be the best drummers they can be on my LRRecords Drummer subscription list. Sign up for more juicy content and exclusive offers >>>